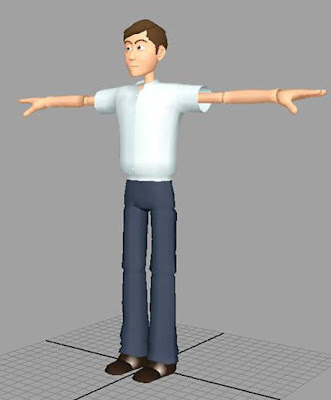
 "Norman" is a very popular and versatile rig and the successor of "Hogan". You can download it here.
- Joey has a nice mod. Click here for the download, more info and feature video.
- Tea Time has another great tutorial on how to mod Norman
- There are two great sites by Shiva Kumar Adloori (and here) and Romain Digonnet which have variations of Norman:
- The AAU Tea Time Club has great tutorials on how to modify Norman. Look for part 1 and part 2.
If you want to see animation examples, visit the critique section on my AAU Character Animation Blog or Spungella. There are also many animation portfolio's online which showcase this highly tweakable rig, for instance Guiherme Jacinto's animation site.
Nair Archawattana wrote this fantastic tutorial on how to modify Norman. If you know of another way or want to add more tips and information, please do so in the comments section.
Thank you Nair for the time and effort you put into it! It's highly appreciated!
Nair Archawattana wrote this fantastic tutorial on how to modify Norman. If you know of another way or want to add more tips and information, please do so in the comments section.
Thank you Nair for the time and effort you put into it! It's highly appreciated!
______________________________________
HOW TO MODIFY NORMAN
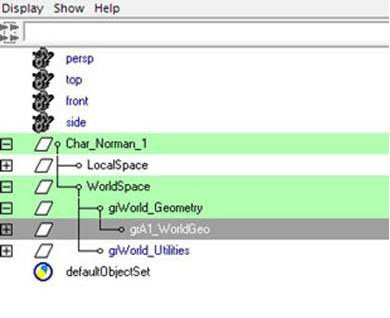 - To be able to select Norman’s geometry, unparent gA1_WorldGeo group from Char_Norman_1 group.
__________
Head/Face
Head/Face
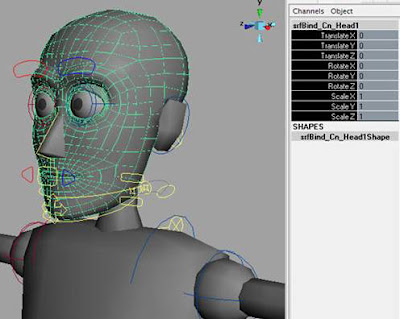
- duplicate head geometry, unlock all attribute channels and put it wherever you like. (I prefer to place it right next to the original one)
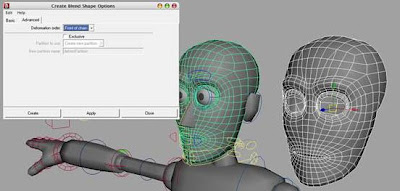
- select a new head, original head and add Blend Shape, make sure that you have Front of Chain selected in Create Blend Shape options (Advanced tab).
- Now, it’s time to play with your new head! You can sculpt it or use deformers to modify his face. Make sure that you turn on your Blend Shape so you can see how it looks on the original head. (To turn on Blend Shape, go to Window > Animation Editors > Blend Shape, the Blend Shape you just add should be “blendShape3” look for it and scroll it up)
______
Notes
Notes
- make sure that you didn’t add more polygons to the head; it might cause some problems with facial rigging. (This applies to the whole body)
- try to avoid an area around eye sockets, too much deformation can make eye lids stick into the eyeballs. (You can check it by using eye control, moving eye lids UD, pull/push and rotate eyeballs to see if you mess up anything or not)
- For shaping the eyes, you can use Lid Micro channels in the eye controllers.
______
Brows
Brows
- duplicate another head from the original head, unlock it.
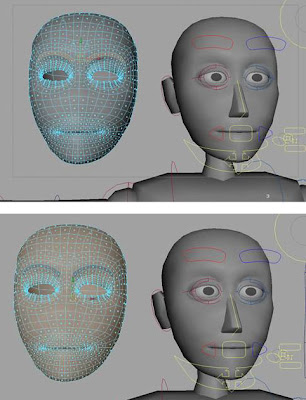
- select face that you want to turn it to eyebrows, then press shift key and crop the whole head to invert the selection. Delete the rest of faces.
- extrude and smooth the brows (this is your choice; you can even use deformers to reshape it.) then, place your new brows on the original head.
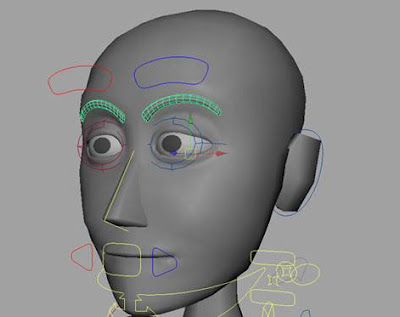
- We will attach brows to the head using Wrap Deformers, select brows and head. Go to Create Deformers > Wrap. Use brows control to check it.
______________
Nose/Ears/Hair
Nose/Ears/Hair
- First, you need to have a replacement for nose, ears and hair. Try to find better models from school library (just cut them off from generic human models or look into the internet)
- delete Norman’s nose/ears, replace them with your new models. Import new hair into your scene and place it on the head.
- parent everything to head control.
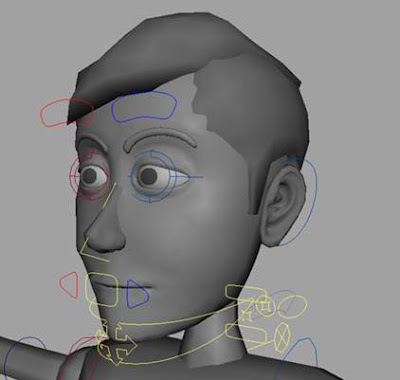
_____
Cloth
Cloth
- Same method with eye brows, though you need to have your cloth models with you. (Build it or copy it from other free rigged characters)
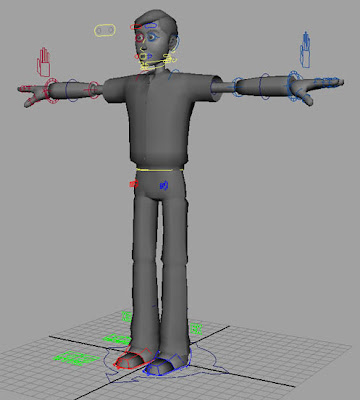
- Import the new cloth into your scene. Place it on Norman’s body.
- This is a bit tricky since the shirt covers more than one geometry. So we will use Add Influence for other parts.
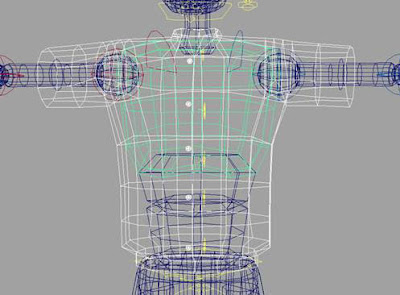
- First, select shirt > select geometry (any geometry that shirt covers it) > go to Create Deformers > Wrap.
-Next, select shirt > select geometry (other geometry that shirt covers it) > go to Edit Deformers > Wrap > Add Influence. Repeat this process till the last geometry underneath the shirt.
- For pants, you have to separate your pants for each leg because Norman’s legs are too close to each other. If you wrap it with single pants model, wrap influence on both legs will overlap and mess up your pants.
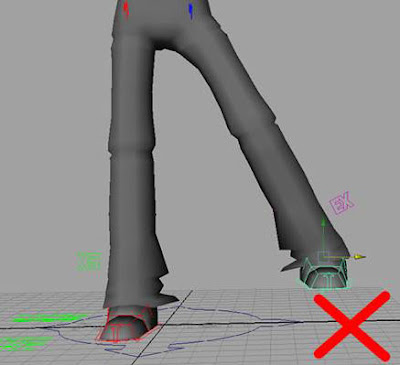
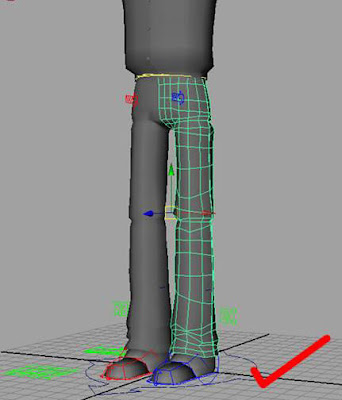
- Making wrap for pants is the same process as wraps for shirt.
- First, select pants > select geometry (any geometry that the pants covers it) > go to Create Deformers > Wrap.
- Next, select pants > select geometry (other geometry that the pants covers it) > go to Edit Deformers > Wrap > Add Influence. Repeat this process till the last geometry underneath the pants. Do the same process with another leg.
_______
Notes
Notes
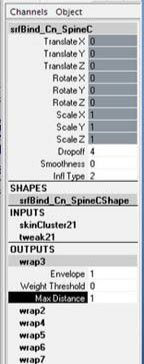
- If you get a warning “No points were weighted to the wrap. Try increasing the maxDistance setting.” Select the geometry that contains that wrap, go to wrap output channel and change the number on Max Distance.
______
Arms
Arms
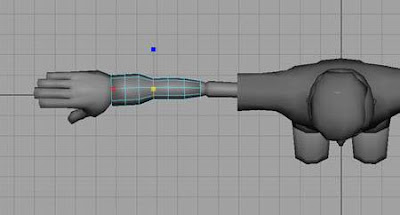
- If you don’t like his thick arms you can reshape it by go to component mode, select edge loop (using tool Select > Select Edge Loop Tool in Polygon mode) and scale it down one by one. Or you can model a new arm and use wrap to attach it.
_______
Hands
Hands
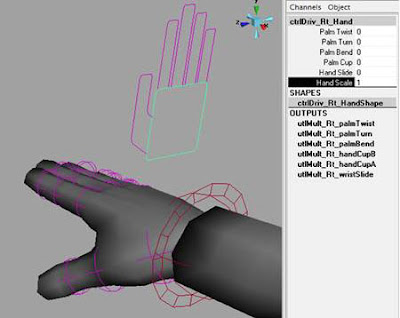
- You can scale up/down his hand with the hand controller.
________________
Body Proportion
Body Proportion
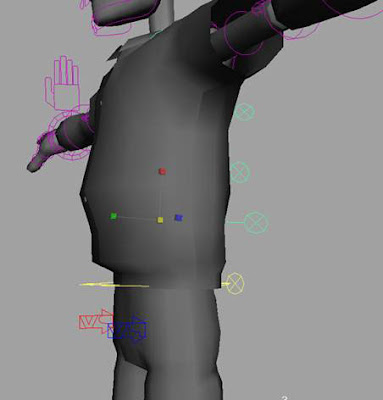
- Scale Up/Down spine controllers to reshape body proportion.
_______________
Tip for Shaders
Tip for Shaders
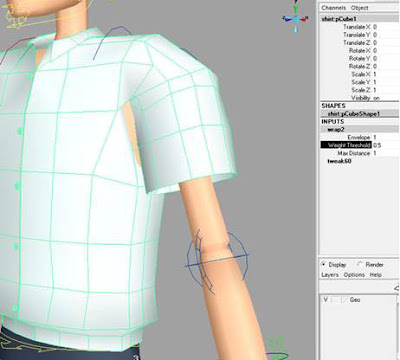
- Sometimes when you wrap your shirt and try to rotate your arm, you’ll get body stick out from the shirt. To fix this problem, select geometry face that sticks out and assign shirt shader to it. Or go to wraps input and change value on Weight Threshold.
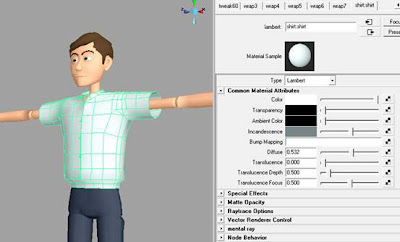
- Also, in shader attribute window, you will see Incandescence setting, try adding some color on this attribute will help your object looks more colorful rather than all-grey shaders.
- Nair
_________________________________________________


22 comments:
Anything related to the Norman rig really shouldn't be posted on this site since only AAC students have access to the rig.
-BadMange
Perhaps, but since some of us aau kids have to search around to find out how to do this.. Well, I for one appreciate it :)
Thanks for posting this!
As Margo said, it is not widely available information, even around the AAU labs.
Thank you for your sharing this! I've always envied the others who can awfully tweak Norman shape.
Thanks a lot....
Thank Nair!
when I wrap the brows and the head, the head dissapear!...I don't understand...help please
Could be a double transformation problem. I don't think I had that problem before. Does anybody have a quick solution for that?
I might have the same issue as Antonio. I can see both the head and the brows I've made perfectly fine in the viewport, but when I render only the brows are visible. I've tried changing the materials for all the geometry.
Does anyone have any ideas what I could do to fix this? Thanks.
If I come up with a solution I'll be sure to post it.
If you can still see it in the viewport but not when you do a render, then click on the geometry that you can't see and open the attributes editor. Under "Render Stats" make sure that "Primary Visibility" is on. Just in case. Other than, I don't know for now.
Thanks so much for your help JD!
That did the trick!
I always seem to forget about the render stats options...
It's really odd that the render stats were intact for the duplicated eyebrows, but not for the original head.
Hi!
I have an animation with Char in my blog, I hope you like.
his name is "Estrellado"
I hope I can do better animation with this character.
I am spanish.
Thank you very much.
This is the video:
http://vimeo.com/10841132
And this is my blog:
http://sergiocifu.blogspot.com/
Hey,
that's very cool! Nice render too! I like how you have him get out and how he stumbles around, nicely done!
When I wrap the brows to the head, the head dissapear!... So another way is to
1.)parent the brow to the main head then duplicate the head & the brow.
2.)Wrap the duplicated head & brow to the original head & brow.
3.)Now delete the original brow on the original head(not on the duplicated head!)
The brow should now follow the head anywhere it moves.
from Stoneycartoon
www.youtube.com/stoneycartoon
Thanks for the tip!
Hey, i was wondering why when i wrap the eyebrows to the face and i make a render the face disappears and i can only see the mouth, teeth eyebrows, tongue, etc... (just the head missing) please i am in a middle of a competition if you could help me i would be very pleased.
Sorry, I haven't had this happen yet.
I would check the render stats and make sure that all the options are on so that you can see the geometry in the render.
Very useful tutorial ,... I were looking for some facial rendering work.
Regards
GameYan Studio
does somebody know how to get a motion trail for the knee with this rig?
we tried to set one to the knee-geometry srfBind_Lf_LegB but tis doesn't seem to work. also a locator parented to the knee-geometry won't work... :/ help would be greatly appreciated
You could simply parent a cube to the geo, or to the FK control curve, or to the bone itself.
Post a Comment